Do you know where was your aadhaar number used for various purposes in the past?
Aadhaar has now become a central part of our life and it’s integrated with so many services. You have your critical information linked to aadhaar, and if you allow a service to authentic yourself using aadhaar number, it fetches your data and uses it.
While it has made life easy and simple, it also opens up to the chances of data leak and someone else using your aadhaar to authenticate for some service.
UIDAI has come up with a service where you can check Aadhaar Authentication History online. Below is a quick video which shows you how you can do it.
The main objective or purpose of this authentication process is to verify the identity of a person and to avoid the fraudulent cases. It helps the service provider to identify whether the person who is requesting for the service is trustworthy or not.
How does the process of authentication work?
When you submit your Aadhaar card at anywhere as an identity proof, that service provider asks you either to submit a copy of your Aadhaar card or sometimes he may ask for your bio-metric details like fingerprint or IRIS.
These details are then submitted to the CIDR of UIDAI i.e. Aadhaar verification department. This request can be initiated through any devise like laptops/desktops or mobiles. CIDR then cross checks this information with the details on UIDAI.
If your details match then the service provider will approve your request.
Aadhaar authentication can be done on the basis of 3 means –
- Bio-metric details – Finger print and IRIS
- Demographic details – Name, age, gender, DOB etc.
- One time password – on registered mobile number
Any service provider where you submit your Aadhaar card as an ID proof can request CIDR for this authentication.
4 steps to check your UIDAI authentication history?
Let’s see these steps briefly –
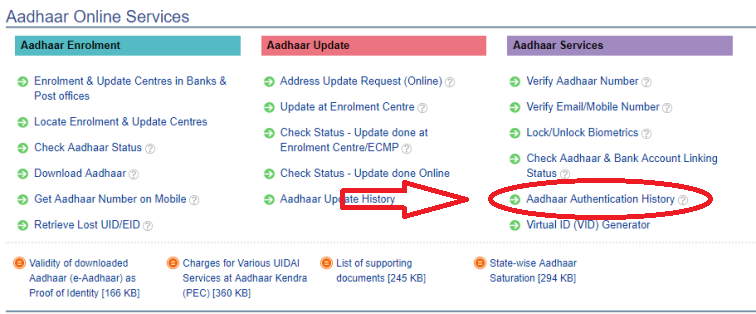
Step #1: Go to the website of UIDAI or you can click here, and then click on “Aadhaar authentication history”

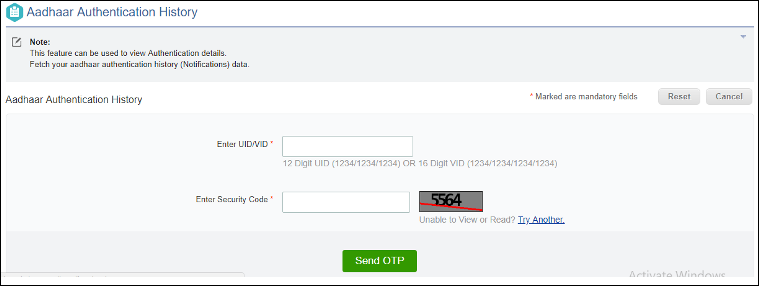
Step #2 – Enter your Aadhaar number and security code and click on generate OTP.

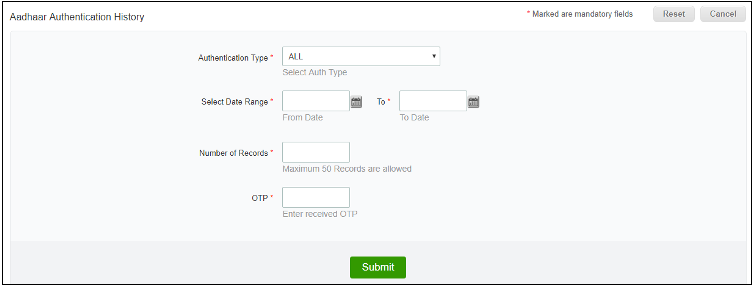
Step #3 – Now select the type of authentication history which you want to check. Then select the time period and how many entries you want to check (You can select maximum 50 entries). Finally enter the OTP you received on your registered mobile number after step 2 and click on submit.

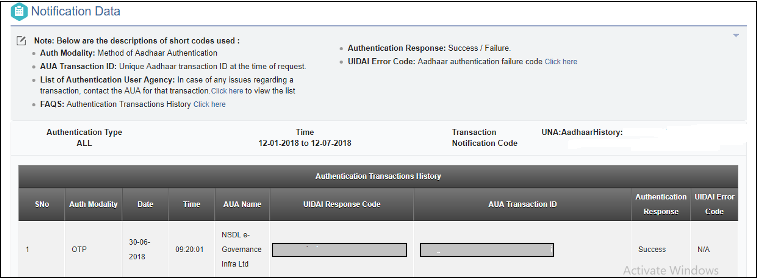
Step #4 – This is the last step of this process where you can see the list of all the entries of authentication process.

Do let us know if you liked this information and if it helped you !

